| Line 35: | Line 35: | ||
Check if there is such an file. | Check if there is such an file. | ||
If not put something like this: | If not put something like this: | ||
[[Media: | [[Media:Automapping_example_rules.txt]] | ||
==setup the rules.tmx== | ==setup the rules.tmx== | ||
Now we need to make the rules with tiled and these rules need to be saved to the path given in the textfile of step 2. | Now we need to make the rules with tiled and these rules need to be saved to the path given in the textfile of step 2. | ||
Revision as of 12:50, 19 September 2010
What is the Automapping feature?
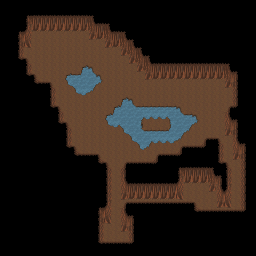
Guess you want to make a map, which looks this:
So you have an idea how the form of the cave is. Now you must create this map. How long does it take? maybe an hour?
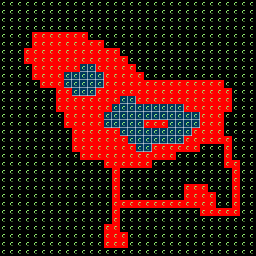
With the automapping feature you just draw the outline of the cave which looks like this:
What are the advantages?
- just one layer to edit
- just draw what you mean there should be (cave in the middle with a little sea)
- no need for drawing and combining many tiles for the wall. This is done automatically
So this feature generates from the given draft the cave. How long does it take to make such an one-layer draft? 10 minutes?
how to use it?
The automapping feature needs to know how the tiles have to be setup, to create such an cave-wall. So we got to create some rules how these walls are generated.
create a new map
Create a new map. Save this map where ever you want. I suggest the tmwdata/maps folder of the "tmwdata" project from our Git repository.
setup rules.txt
Within the same folder of your map there needs to be a textfile "rules.txt", which contains pathes to rulefiles.
Check if there is such an file. If not put something like this: Media:Automapping_example_rules.txt
setup the rules.tmx
Now we need to make the rules with tiled and these rules need to be saved to the path given in the textfile of step 2.

